
Dreaming of Building a Droid
Ever since I first saw the quirky charm of astromechs rolling across the screen, I’ve been hooked. There’s something magical about bringing a droid to life—not just as a machine, but as a character with personality, quirks, and presence. That’s why I’ve decided to build one myself.
It’s not just about assembling parts—it’s about learning. I want to master the art of 3D printing, shaping custom components that fit together with precision and style. I’m diving into electronics, figuring out how to wire servos, sensors, and lighting effects that make the droid move, react, and glow like it’s straight out of the galaxy.
Painting is another frontier—learning how to layer colours, weather the surfaces, and give my creation a lived-in, battle-worn look that tells a story.
Then there’s the wiring—the veins of the droid—connecting everything in a way that’s clean, functional, and reliable, oh yer did i mention about learning Arduino code for programming the droid, hmm.
This journey is as much about the process as the final product. Every skill I pick up, every challenge I overcome, brings me closer to building something that’s not just cool—but meaningful. A droid that turns heads at Comic Con, sparks smiles at charity events, and maybe even inspires someone else to start their own build.
Tools for Droid Building
3D Printing
- 3D Printer (e.g., Prusa, Creality, Bambu Lab): For printing custom parts, shells, and internal mounts.
- Slicing Software (like Cura or PrusaSlicer): To prepare your models for printing.
- Digital Calipers: For precise measurements and fitting.
- Deburring tools & sandpaper: To clean up prints and ensure smooth assembly.
Electronics & Wiring
- Soldering Iron + Solder: For connecting wires, components, and boards.
- Wire Strippers & Cutters: Essential for clean, safe wiring.
- Multimeter: To test voltage, continuity, and troubleshoot circuits.
- Heat Shrink Tubing & Electrical Tape: For insulation and tidy wiring.
- Breadboard & Jumper Wires: Great for prototyping before final assembly.
- Microcontrollers (e.g., Arduino, Raspberry Pi): The brains behind movement, lights, and sounds.
- Servo Motors & Motor Drivers: For articulation and movement.
- LEDs, Sensors, Speakers: To add personality and interactivity.
Painting & Finishing
- Airbrush Kit or Spray Paints: For smooth, professional finishes.
- Acrylic Paints & Brushes: For detailing and weathering effects.
- Masking Tape & Stencils: To create clean lines and custom graphics.
- Clear Coat & Primer: To protect and prep surfaces.
- Weathering Tools (sponges, steel wool, etc.): To give your droid that battle-worn authenticity.
Assembly & Fabrication
- Screwdrivers, Allen Keys, Wrenches: For mechanical assembly.
- Drill & Dremel Tool: For modifying parts and adding holes.
- Hot Glue Gun & Epoxy: For quick fixes and strong bonds.
- Clamps & Vise: To hold parts steady during work.
If you’re building something like R2-D2 or Chopper, you’ll also want:
- Casters or omni-wheels for mobility
- Sound boards for authentic voice effects
- Remote control systems or app-based interfaces for interaction
Top Programming Languages for Droid Software
| Language | Best For | Why It’s Great |
|---|---|---|
| Python | AI, sensors, Raspberry Pi, voice interaction | Easy to learn, huge library support (e.g., OpenCV, PySerial, TensorFlow) |
| C/C++ | Microcontrollers (Arduino), real-time control | Fast, low-level access to hardware, widely used in robotics |
| JavaScript | Web-based control panels, Node.js servers | Great for remote interfaces, integrates well with IoT platforms |
| Java | Android apps, Bluetooth control | Stable, good for mobile integration and complex logic |
| Scratch / Blockly | Educational builds, visual programming | Perfect for younger builders or quick prototyping with drag-and-drop logic |
| ROS (Robot Operating System) | Advanced robotics frameworks | Not a language per se, but uses Python and C++ to manage complex robot behaviors |
Typical Use Cases in Droid Building
- Arduino (C++): For controlling servos, LEDs, and sensors with precise timing.
- Raspberry Pi (Python): For higher-level tasks like speech synthesis, camera input, or Wi-Fi control.
- Node.js (JavaScript): To create a web dashboard for remote control or telemetry.
- Bluetooth/Android (Java): If you want your droid to respond to commands from your phone.
If you’re building a droid with personality—like giving Chopper a mischievous streak or letting R2-D2 react to voice commands—you might combine Python for AI and sound with C++ for motor control. Want help sketching out a software architecture for one of your builds? I’d love to dive into it with you.
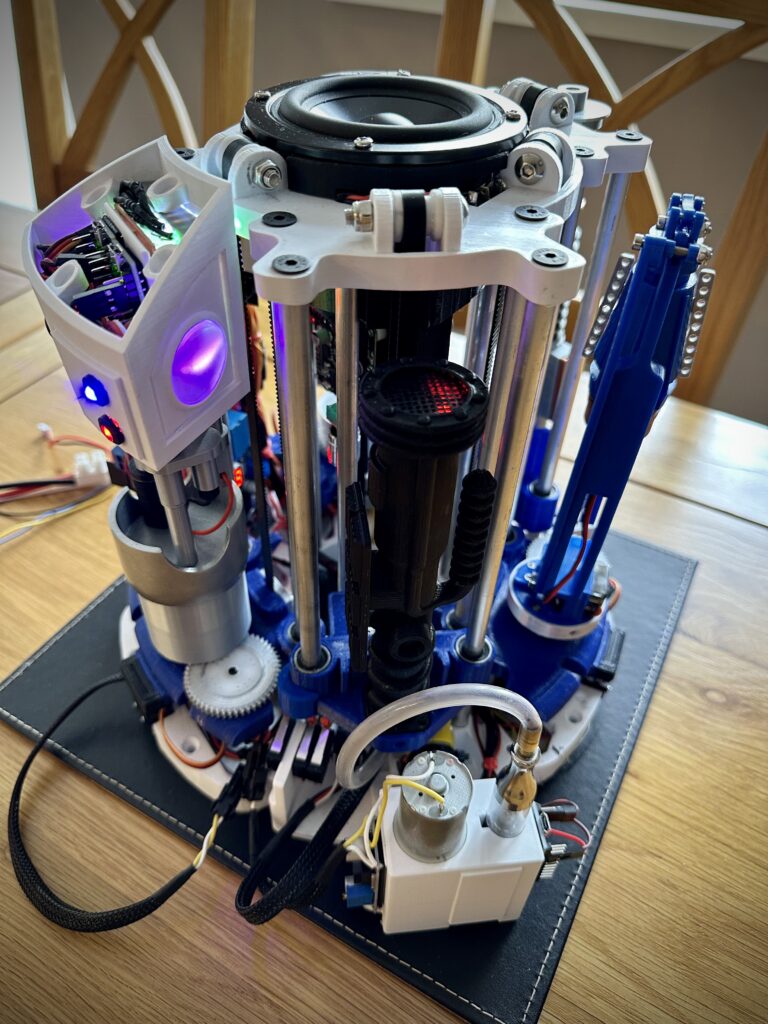
Building my own R2D2
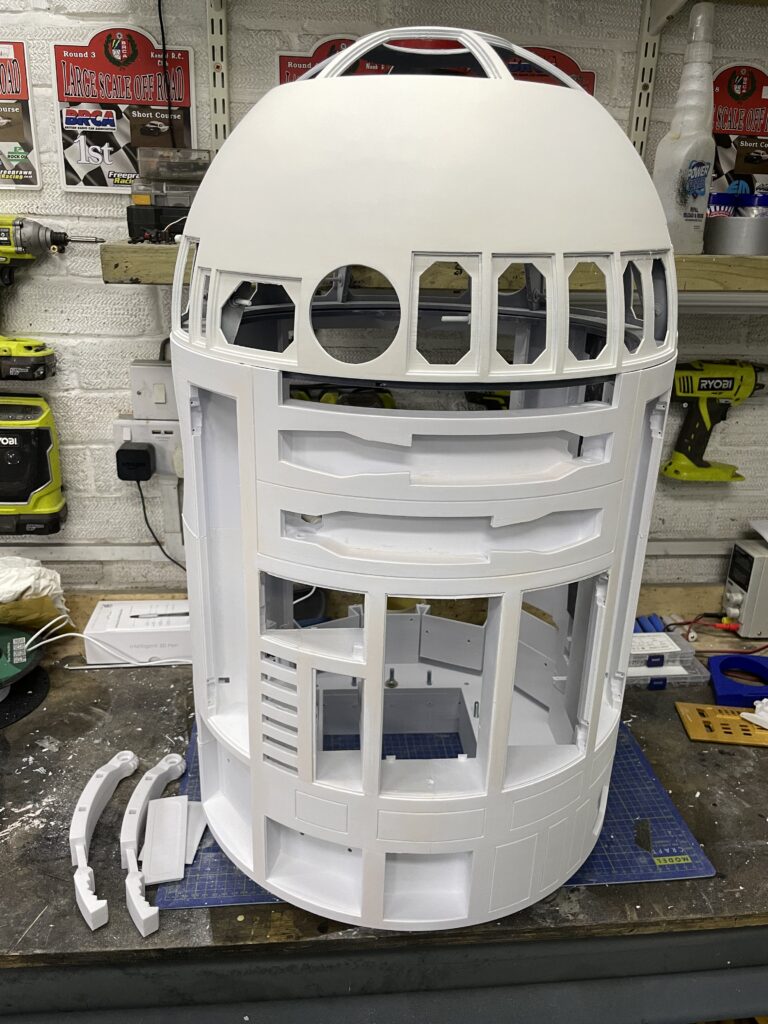
So I built my own R2-D2 from the ground up, starting entirely with 3D printing. Every single part of the droid was printed, then I went through a detailed finishing process to get a smooth, realistic look. First, I sanded all the raw 3D-printed pieces to remove layer lines, then applied filler where needed to smooth out any imperfections. After that, I sanded everything again until the surfaces were clean and even.
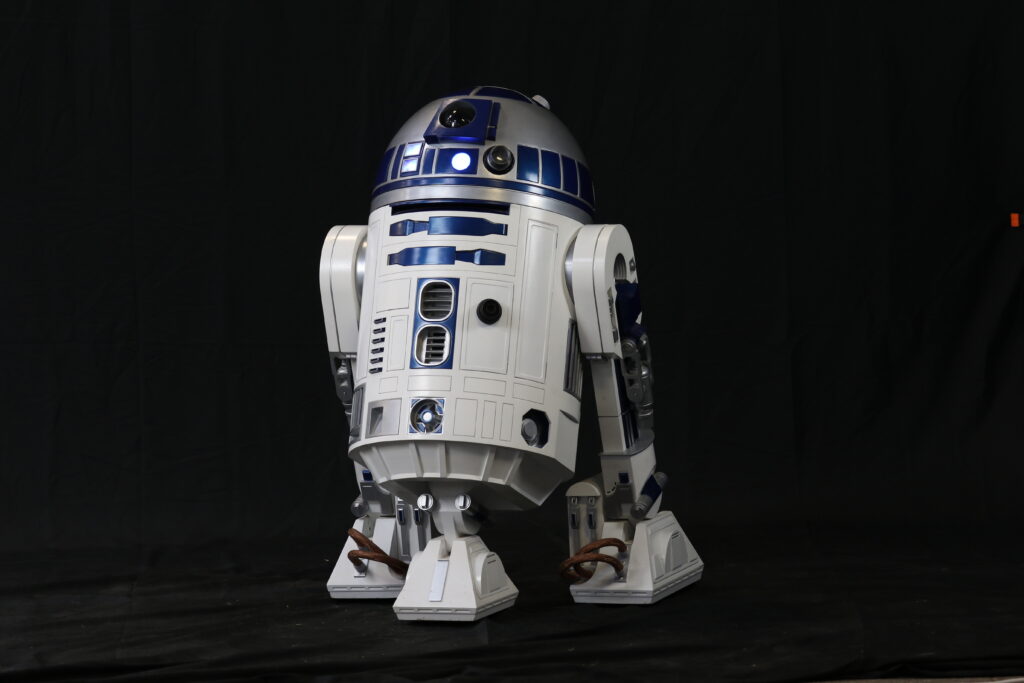
Once the parts were prepared, I applied a high-build primer to help fill in the fine lines and create a uniform surface. I then flatted (wet-sanded) the primer to achieve a perfectly smooth base for painting. Finally, I carefully painted each part to bring R2-D2 to life, making sure the finish looked clean and authentic.
The result is a fully 3D-printed R2-D2 with a professional, screen-accurate finish.
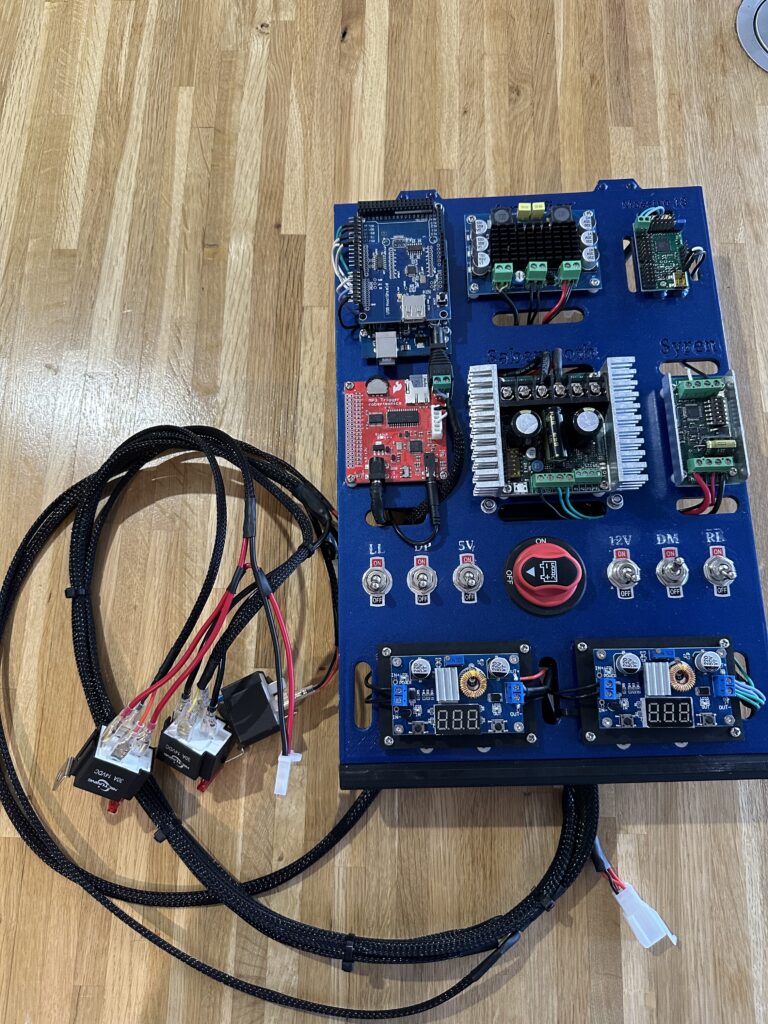
Wiring Overview: Droid Control System Integration
This setup combines precision motor control, power regulation, and flexible servo management to bring your droid to life. All components are mounted to a custom 3D-printed board for clean layout and easy maintenance.
Power Distribution
- Main Power Source: 2 x Ryobi 18v battery packs feeds the system.
- Buck Converters: Two buck converters step down voltage:
- One to 12V for the Arduino and Mini Maestro.
- One to 6V for servos and auxiliary components.
- Ensure all grounds (GND) from the battery, buck converters, and controllers are tied together on a common ground rail.
Arduino Wiring
- Power: Connect 5V from buck converter to Arduino’s VIN or 5V pin.
- Ground: Link to shared ground.
- Signal Outputs: Use digital pins to send commands to the Sabertooth (via serial) and trigger actions on the Mini Maestro if needed.
- Serial Communication: If using SoftwareSerial, designate TX/RX pins for Sabertooth control.
Sabertooth Motor Controller
- Power In: Connect directly to the 12V battery.
- Motor Outputs: Wire to drive motors (e.g., for droid wheels or dome rotation).
- Signal In: Connect Arduino TX to Sabertooth’s S1 input (for serial mode).
- Mode Configuration: Set DIP switches for simplified serial mode (refer to Sabertooth manual).
- Ground: Tie to shared ground.
Pololu Mini Maestro
- Power: Connect 5V from buck converter to VIN.
- USB or UART: Use USB for PC configuration or UART for Arduino
Sounds good fun doesn’t it , well its fun but frustrating at the same time, that’s why i now have a collection of them….
